
If you’ve ever asked what is a network rack, the short answer is this: it’s the steel frame that holds your switches, patch panels, UPS units, and other networking hardware in one organized, accessible location. Think of it as the backbone mount for everything that keeps your business connected.
But picking the right rack matters more than most people realize. The wrong size, depth, or type can create airflow problems, limit future expansion, or turn a clean MDF closet into a tangled mess of cables and gear. For commercial facilities, warehouses, office buildouts, distribution centers, getting this decision right from the start saves real time and money down the road.
At CommX Networks, we’ve spent 18 years designing and installing network infrastructure for commercial environments across Southwest Florida. Rack selection and layout is one of the first conversations we have with every client because it directly affects performance, cable management, and scalability. This article breaks down the types of network racks, how depth and unit size work, the differences between network and server racks, and how to determine which setup fits your facility. Whether you’re planning a new buildout or reorganizing existing infrastructure, this guide gives you the knowledge to make a confident decision.
A network rack is a standardized metal frame designed to mount and organize networking equipment in a fixed, accessible location. When someone asks what is a network rack, the practical answer is that it’s the physical structure that brings all your active and passive network components together in one place. Instead of scattering switches, patch panels, and cable management hardware across a room or stacking equipment on shelves, a rack holds everything in a vertical column with consistent spacing, secure mounting points, and room to grow.
A properly configured network rack is the foundation of every reliable commercial network, because disorganized hardware leads directly to connectivity problems and longer troubleshooting times.
Racks are built to accept equipment that follows a standard width of 19 inches across the mounting flange. This standard, defined by the Electronic Industries Alliance (EIA), means that compatible hardware from different manufacturers mounts cleanly into the same frame. You can mix a Cisco switch, a patch panel from a separate vendor, and a UPS unit without worrying about fitment, as long as each piece is rated for 19-inch rack mounting.
Every piece of rack-mounted equipment is measured in rack units, abbreviated as "U." One rack unit equals 1.75 inches of vertical space. This measurement standardizes how much room each device occupies and makes it straightforward to calculate how many devices a rack can hold before you purchase anything. A switch rated at 1U takes up one slot. A larger device rated at 2U takes up two. Your total rack height, usually expressed as something like 12U, 24U, or 42U, tells you the maximum number of rack units available in that frame.
Understanding rack units matters before you spec out a buildout. If you’re planning a 24-port patch panel (1U), a managed switch (1U), and a fiber termination panel (1U), along with a UPS at 2U, you’re already at 5U before accounting for cable management panels or future hardware. Leaving room for growth is something that gets overlooked in initial planning, and it’s one of the most common issues we see in network closets that outgrow their racks within a year or two.
The hardware that lives in a network rack falls into two categories: active equipment and passive equipment. Active equipment requires power and processes data, while passive equipment organizes and routes physical connections without drawing power of its own. Both categories are necessary in any well-planned commercial rack.
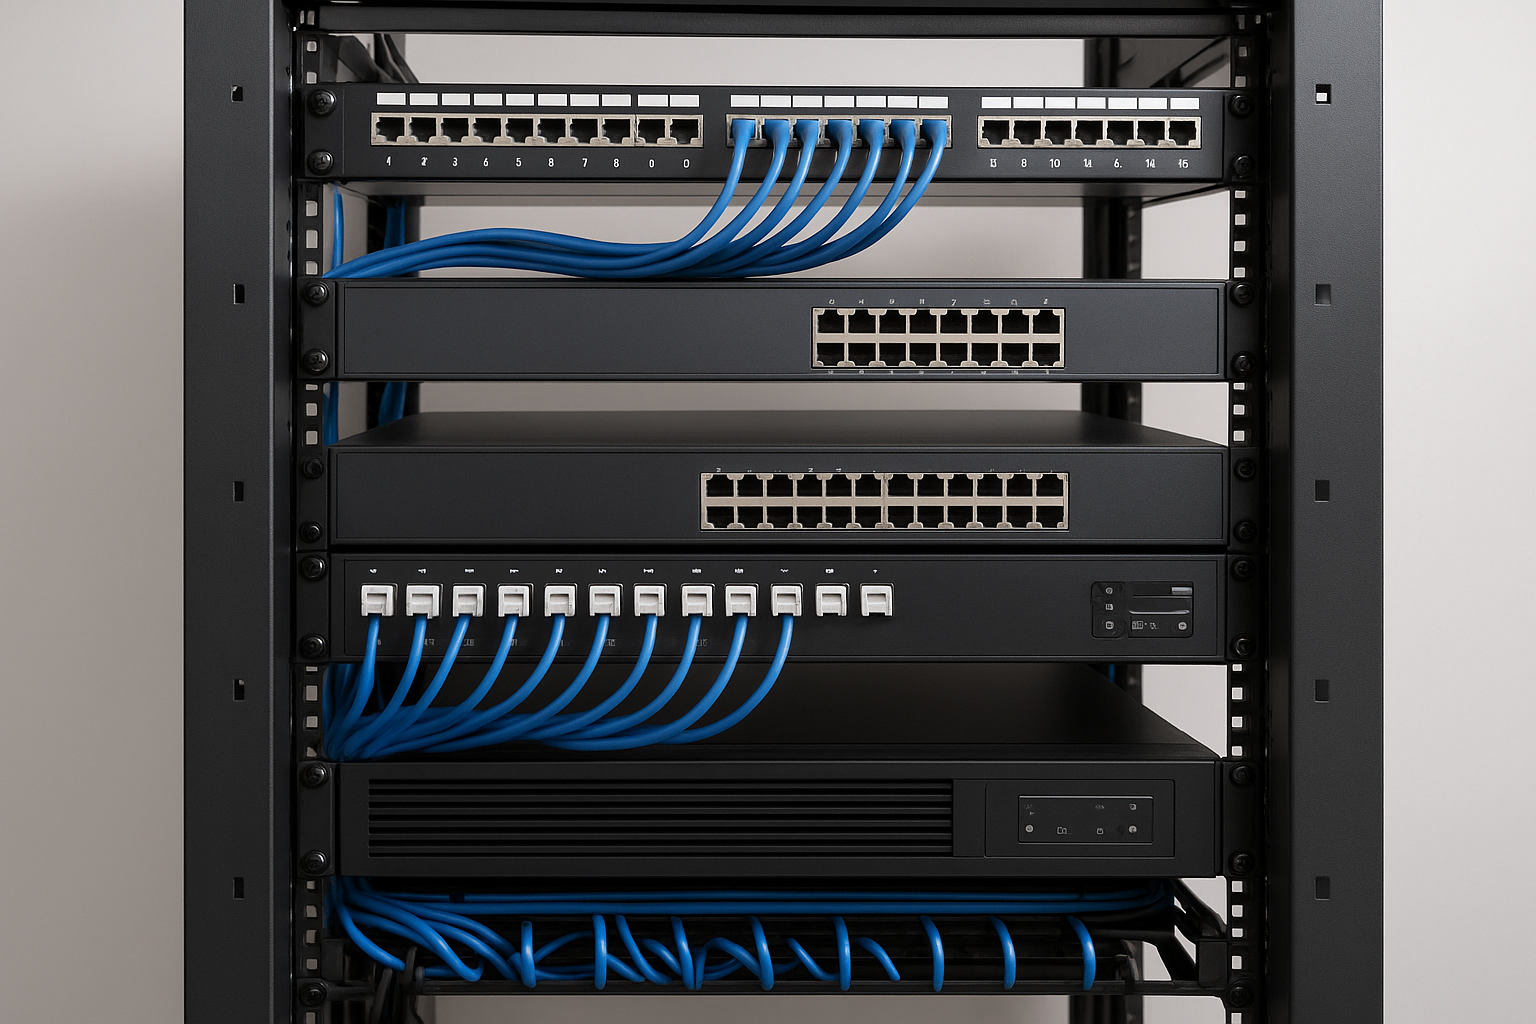
Here’s a breakdown of the most common components you’ll find in a commercial network rack:
| Component | Type | Purpose |
|---|---|---|
| Network switch | Active | Connects devices and manages data traffic across the LAN |
| Patch panel | Passive | Terminates incoming cable runs and labels port connections |
| Fiber termination panel | Passive | Terminates and protects fiber optic connections |
| UPS (uninterruptible power supply) | Active | Provides backup power and surge protection |
| Cable management panels | Passive | Routes and organizes patch cables inside the rack |
| Wireless access point controller | Active | Manages access points across the facility |
| KVM switch | Active | Controls multiple servers from a single keyboard and monitor |
Patch panels and cable management panels are especially important in commercial environments because they determine whether your rack stays organized and easy to troubleshoot over time. A rack without proper passive organization tends to become difficult to manage quickly, particularly in larger facilities where hundreds of cable runs terminate in a single MDF or IDF closet.
Most business owners focus on the equipment itself, but where and how that equipment is mounted determines whether your network holds up under daily operational demands. Understanding what is a network rack helps clarify why this isn’t just an aesthetic choice. A rack keeps your hardware physically secure, thermally manageable, and logically organized in a way that loose installations on shelving or the floor simply cannot match. For commercial facilities running dozens of devices across multiple floors or zones, that organization is the difference between a network that’s easy to maintain and one that generates recurring problems.
When networking hardware sits in a structured rack, every port, panel, and cable run has a defined location. Technicians can trace a connection, swap a failed switch, or add capacity without disrupting adjacent devices. Without a rack, gear tends to pile up over time, and cables become difficult to follow. Troubleshooting time increases significantly when no clear organization exists, which translates directly to longer outages and higher labor costs when something goes wrong. A business running a warehouse with hundreds of connected devices cannot afford that kind of guesswork during a connectivity failure.
Organized infrastructure is not a luxury for large facilities; it’s the baseline requirement for maintaining network reliability without spending excessive time on problem isolation.
A rack also provides structural protection for hardware that costs thousands of dollars to replace. Equipment mounted in a locked, enclosed rack cabinet is protected from accidental contact, dust accumulation, and unauthorized access. Many commercial racks include front and rear doors with locking mechanisms, which matters in environments like distribution centers or shared office spaces where non-IT staff regularly move through the network closet.
Airflow is another factor that racks address directly. Most rack-mounted equipment is designed to pull cool air from the front and exhaust heat from the rear. When you mount hardware in a standard rack, that airflow path stays consistent and predictable. Mixing rack-mounted gear with standalone equipment or stacking units without proper spacing creates hotspots that shorten hardware lifespan. In Southwest Florida’s climate, where ambient temperatures in non-climate-controlled server rooms can spike during summer months, managing heat through proper rack design becomes especially critical for keeping gear running reliably year-round. Skipping this step costs more in premature hardware failure than any rack investment would have.
Once you understand what is a network rack, the next question that usually comes up is how it differs from a server rack. The terms get used interchangeably, but they describe hardware optimized for different tasks. Network racks are built around relatively shallow, lightweight gear like switches and patch panels. Server racks are built to support dense, heavy computing hardware that generates significantly more heat and draws much more power. Choosing the wrong type for your environment creates real problems with weight, depth, and airflow.
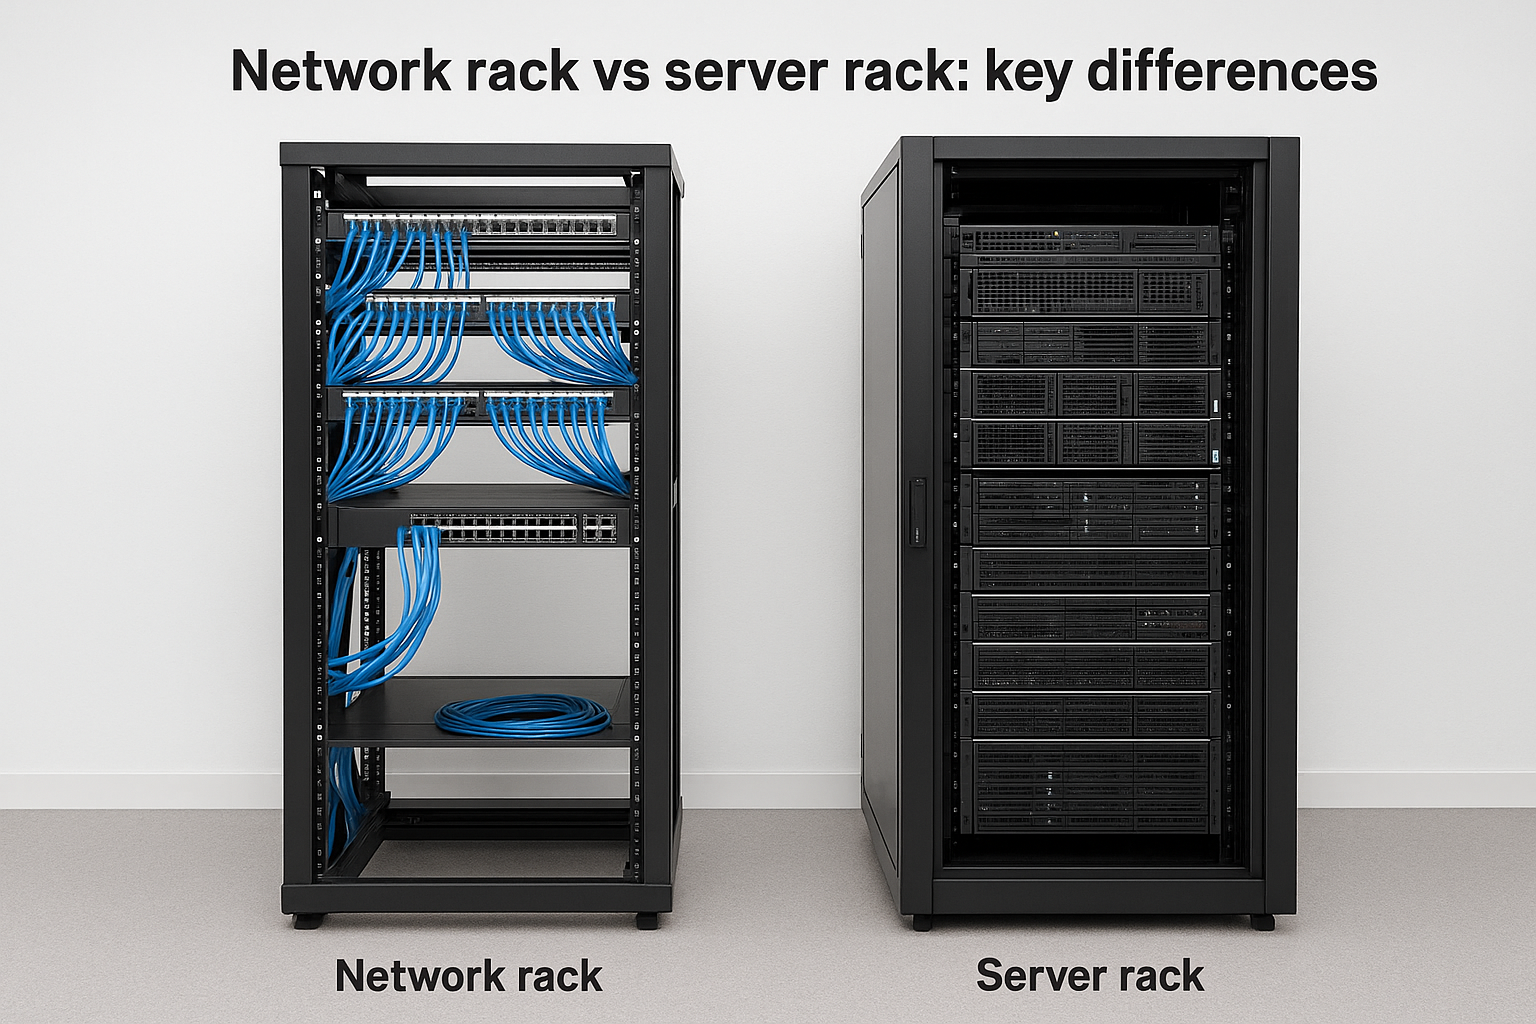
Treating network racks and server racks as interchangeable leads to equipment that doesn’t fit correctly, cables that don’t reach, and thermal issues that shorten hardware lifespan.
Server racks exist to house compute and storage hardware: physical servers, storage arrays, and the power distribution units (PDUs) that feed them. This equipment runs deeper, heavier, and hotter than standard networking gear. A single 1U server can weigh 25 to 35 pounds and extend 28 to 36 inches deep, which is why server racks are built with heavier steel frames, deeper rail systems, and reinforced floors or mounting points. They also require dedicated cable management arms at the rear to handle the dense power and data connections that servers carry.
Server racks typically include front-to-back airflow design with hot aisle and cold aisle configurations in mind. Data centers and server rooms are laid out specifically to support that airflow pattern. Network gear installed in a server rack without accounting for these depth and airflow differences often ends up with poor cable routing and inadequate cooling.
Both types use the same 19-inch EIA mounting standard, which means rack-mounted equipment physically fits in either frame. That shared standard is where most of the confusion starts. A managed switch rated for 19-inch mounting will slide into a server rack just as easily as a network rack, but the surrounding environment, depth, and power infrastructure may not match what that switch actually needs. Network gear typically runs fine in 18- to 24-inch-deep racks, while server racks run 29 to 40 inches deep, leaving a gap behind shallow equipment that complicates rear cable management.
For commercial facilities that need both compute hardware and networking gear in the same space, the standard approach is to keep them in separate racks within the same room. This lets each rack type stay optimized for its equipment without forcing compromises that affect airflow, cable routing, or structural load limits.
Once you understand what is a network rack at a basic level, the next step is knowing which type fits your specific environment. Not every facility needs the same solution. The physical layout of your space, your security requirements, and the volume of equipment you’re managing all point toward a specific rack format. Choosing the wrong type creates a retrofit situation later, which costs more time and money than selecting correctly from the start.
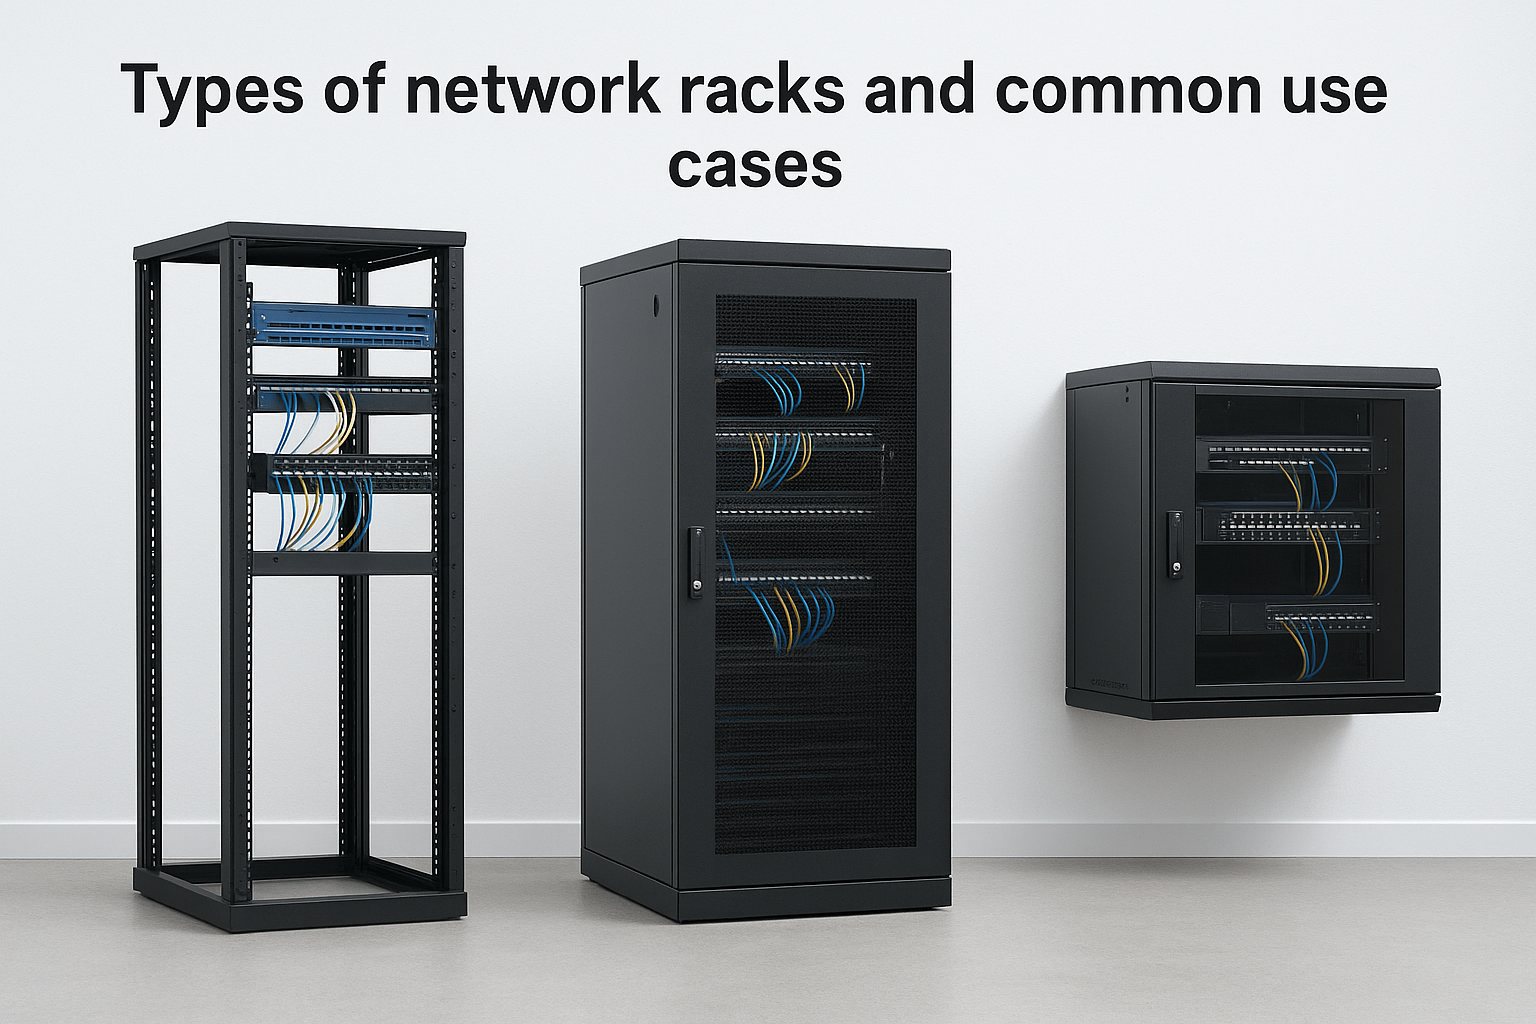
Open frame racks use a two-post or four-post design with no side panels, doors, or enclosure. Airflow is unrestricted, which makes this format a strong choice for active networking gear like switches and routers that run warm and benefit from natural convection. Technicians can access every port and cable from any angle without opening a door, which speeds up patching and troubleshooting in MDF and IDF closets that see regular maintenance. Four-post open frame racks offer more stability and are the better option when you’re mounting heavier or deeper equipment alongside standard switching gear.
This format works best in dedicated, locked network closets where physical security comes from the room itself rather than the rack enclosure. Warehouses, distribution centers, and manufacturing plants with secured IDF closets regularly use open frame racks because they keep maintenance fast and straightforward for technicians working across large facilities.
Enclosed cabinets add side panels, front and rear doors, and locking mechanisms to the standard rack frame. This format fits environments where the rack sits in a shared space, a hallway closet, or any area where non-IT staff move through regularly. The enclosure protects hardware from accidental contact and limits unauthorized access without requiring a separate secured room.
If your network gear sits outside a dedicated locked room, an enclosed cabinet is the right choice regardless of facility size.
Dust management is another reason to choose an enclosed cabinet, particularly in industrial environments where airborne particles can accumulate inside open equipment over time. Enclosed cabinets with filtered venting panels handle airflow while keeping contaminants out, which extends hardware lifespan in manufacturing and warehouse settings.
Wall-mount racks are compact frames that bolt directly to a wall and typically hold between 4U and 18U of equipment. They work well in small offices, retail locations, or branch sites where a full floor-standing rack would be excessive. A wall-mount rack keeps your patch panel, a small switch, and a UPS organized without consuming floor space in a cramped telecom closet.
This format is especially common in multi-floor office buildouts where each floor has a small IDF that feeds back to a central MDF on the main floor. Each floor gets a tidy, wall-mounted solution that handles local connections cleanly without requiring a dedicated room.
Sizing is where most planning mistakes happen, and it’s also one of the most practical parts of understanding what is a network rack in a real-world context. Three measurements define every rack: height in rack units, physical depth, and internal width. Getting these numbers wrong before you purchase means equipment that doesn’t fit, cables that don’t reach, or a rack that fills up faster than expected. Before you spec any rack for a commercial environment, you need to work through each dimension deliberately.
Rack height is measured in rack units (U), where each U equals 1.75 inches of vertical mounting space. A common 42U rack stands roughly 73 inches tall and is the standard for full-size floor-standing installations in MDF rooms and data closets. Smaller footprints call for shorter options, typically 12U, 18U, or 24U, which suit wall-mount applications or branch office IDFs with limited equipment counts.
Always add at least 25 percent extra capacity to your initial rack unit count, because networks grow and retrofitting a full rack mid-project wastes time and budget.
The table below shows common rack heights and where they typically fit in commercial environments:
| Rack Height | Physical Height (approx.) | Common Use Case |
|---|---|---|
| 6U – 12U | 11" – 22" | Small office, retail branch, wall-mount IDF |
| 18U – 24U | 31" – 42" | Mid-size office IDF, compact server room |
| 42U | ~73" | Full MDF, data center row, high-density LAN environment |
Rack depth is the measurement from the front mounting rail to the rear mounting rail, and it determines which equipment physically fits in your rack without forcing cables into tight bends or leaving hardware unsupported at the rear. Standard networking gear, including switches, patch panels, and fiber termination panels, runs 15 to 24 inches deep, which means a rack with 18 to 24 inches of usable depth handles nearly all common networking hardware comfortably.

Problems appear when facilities try to mount deeper equipment, like certain UPS units or wireless controllers, in racks that are too shallow. Always check the manufacturer’s spec sheet for the mounted depth of each device before finalizing your rack purchase. Four-post racks give you adjustable rail positioning, which adds flexibility when your equipment mix includes devices with varying depths across the same installation. For most commercial network closets in Southwest Florida, a four-post open frame or enclosed cabinet with 24 inches of usable depth covers the full range of standard networking hardware without restriction.
Understanding what is a network rack at a structural level is one thing, but the accessories and supporting components you pair with it determine whether your installation holds up under real operational conditions. A bare rack frame is just the starting point. The hardware you add around your active equipment directly affects how long devices last, how fast technicians can work, and how cleanly your cable runs stay organized over time. Planning these components before you order anything prevents gaps that force improvised fixes later.
Every rack needs a reliable way to deliver clean, protected power to every device mounted inside it. A rack-mounted power distribution unit (PDU) runs vertically or horizontally along the rear interior of the frame and provides multiple outlets for your switches, patch panels, and other active gear. PDUs designed for rack use are far more organized than power strips, and they often include surge protection, outlet-level monitoring, and remote switching features that matter in commercial environments where unplanned downtime has real costs.
Skipping a proper PDU and using consumer-grade power strips in a commercial rack is one of the fastest ways to create a fire hazard and void your equipment warranties at the same time.
Pair your PDU with a UPS unit sized to your load requirements so that a power interruption does not take down your network mid-shift. In warehouses and industrial facilities with less stable power feeds, the UPS also conditions incoming power and absorbs voltage spikes before they reach your equipment.
Horizontal cable management panels mount in the rack between active devices and give patch cables a defined path across the front of the frame. Without them, patch cables drape across port faces, block airflow, and make adding or removing a single cable a disruptive process. Most installations benefit from placing a 1U horizontal manager between every one or two patch panels, which keeps cable density under control as your port count grows.
For larger racks with high port counts, vertical cable managers that run along the sides of the frame handle the main runs that travel up and down the rack before fanning out to individual panels. Velcro cable ties rather than zip ties let technicians reorganize runs without cutting and replacing fasteners every time a change is made. Labeling every patch cable and panel port from day one completes the management picture and reduces troubleshooting time to minutes instead of hours when a connectivity problem surfaces.
Choosing the right rack comes down to matching the frame to your specific environment, not defaulting to the most common option or the least expensive one. Once you understand what is a network rack at a functional level, the selection process follows a clear sequence: document your equipment, measure your space, and assess your access requirements before committing to any purchase. Skipping any one of these steps leads to a rack that runs out of room within a year or doesn’t fit the physical reality of your facility.
Before you look at a single rack spec sheet, write down every device you plan to mount and note the rack units each one requires. Your total U count, including patch panels, switches, UPS units, and cable management panels, gives you a working baseline. From that number, add at least 25 percent additional capacity to account for devices you’ll add as your network grows. A facility that builds out 20U of gear today should target a 26U to 30U rack at minimum, not a frame that fits current hardware with nothing left over.
Pull the manufacturer spec sheet for each device and note the mounted depth. Depth mismatches between your rack rails and your hardware cause more installation problems than any other sizing error, and one extra step in your planning process eliminates them entirely.
Always spec your rack based on where you expect to be in three years, not where you are on installation day.
Your physical space sets hard limits on which formats work. A standard 42U floor-standing rack needs adequate ceiling clearance, open floor space for front and rear access, and a room that can hold a frame nearly six feet tall. Smaller IDFs and branch offices often require wall-mount or shorter floor-standing options in the 12U to 24U range because full-size racks crowd the room or block egress routes entirely. Measure before you order.
Your environment determines whether you need an enclosed locking cabinet or an open frame rack. If your network gear sits in a dedicated, locked telecom room that only authorized staff enter, an open frame rack keeps maintenance fast and ventilation unrestricted. If the rack lives in a shared space or a hallway closet, an enclosed cabinet with front and rear locking doors is the correct choice regardless of how much gear you’re mounting inside it.
Setting up a rack correctly from the start is far easier than reorganizing one that was rushed into service. Once you understand what is a network rack at a functional level, the physical installation follows a logical sequence: install structural components first, mount active gear second, and run cables last. Reversing that order forces you to work around cables and devices that are already in place, which slows the job and increases the chance of poor cable routing that causes problems for years.
Start with your passive components at the bottom of the rack: patch panels, fiber termination panels, and cable management panels. These items rarely need power access and anchoring them first gives you a clean reference point for organizing everything above them. Mount your UPS unit next, typically in the lower-middle section of the rack where its weight keeps the center of gravity low and reduces tip risk on floor-standing units. Place your active gear, including switches and wireless controllers, above the passive layer where airflow reaches them cleanly.
Mount heavier components low in the rack and lighter active gear higher to keep the frame stable and the airflow path unobstructed.
Leave at least one blank U of space above any device that runs warm, such as a managed switch under consistent load, to prevent heat from stacking between adjacent components. Blank panel fillers belong in every unused slot because open gaps pull warm exhaust air back into the front of the rack, which undermines your cooling setup entirely.
Label every patch cable at both ends before you dress it into the frame, not after. Retroactive labeling on a fully wired rack is slow and often incomplete, which means the next technician who works in that closet has to trace connections manually instead of reading a label. Use a consistent naming convention that ties each cable back to the port on your patch panel and the device it connects to, so any team member can follow a connection without guessing.
Ongoing rack management means auditing your cable organization every time a change is made. Remove unused patch cables, update labels when ports are reassigned, and keep a current diagram of your rack layout stored both physically inside the cabinet door and digitally so your team can reference it remotely. A rack that gets maintained this way stays functional and easy to work in as your network grows.
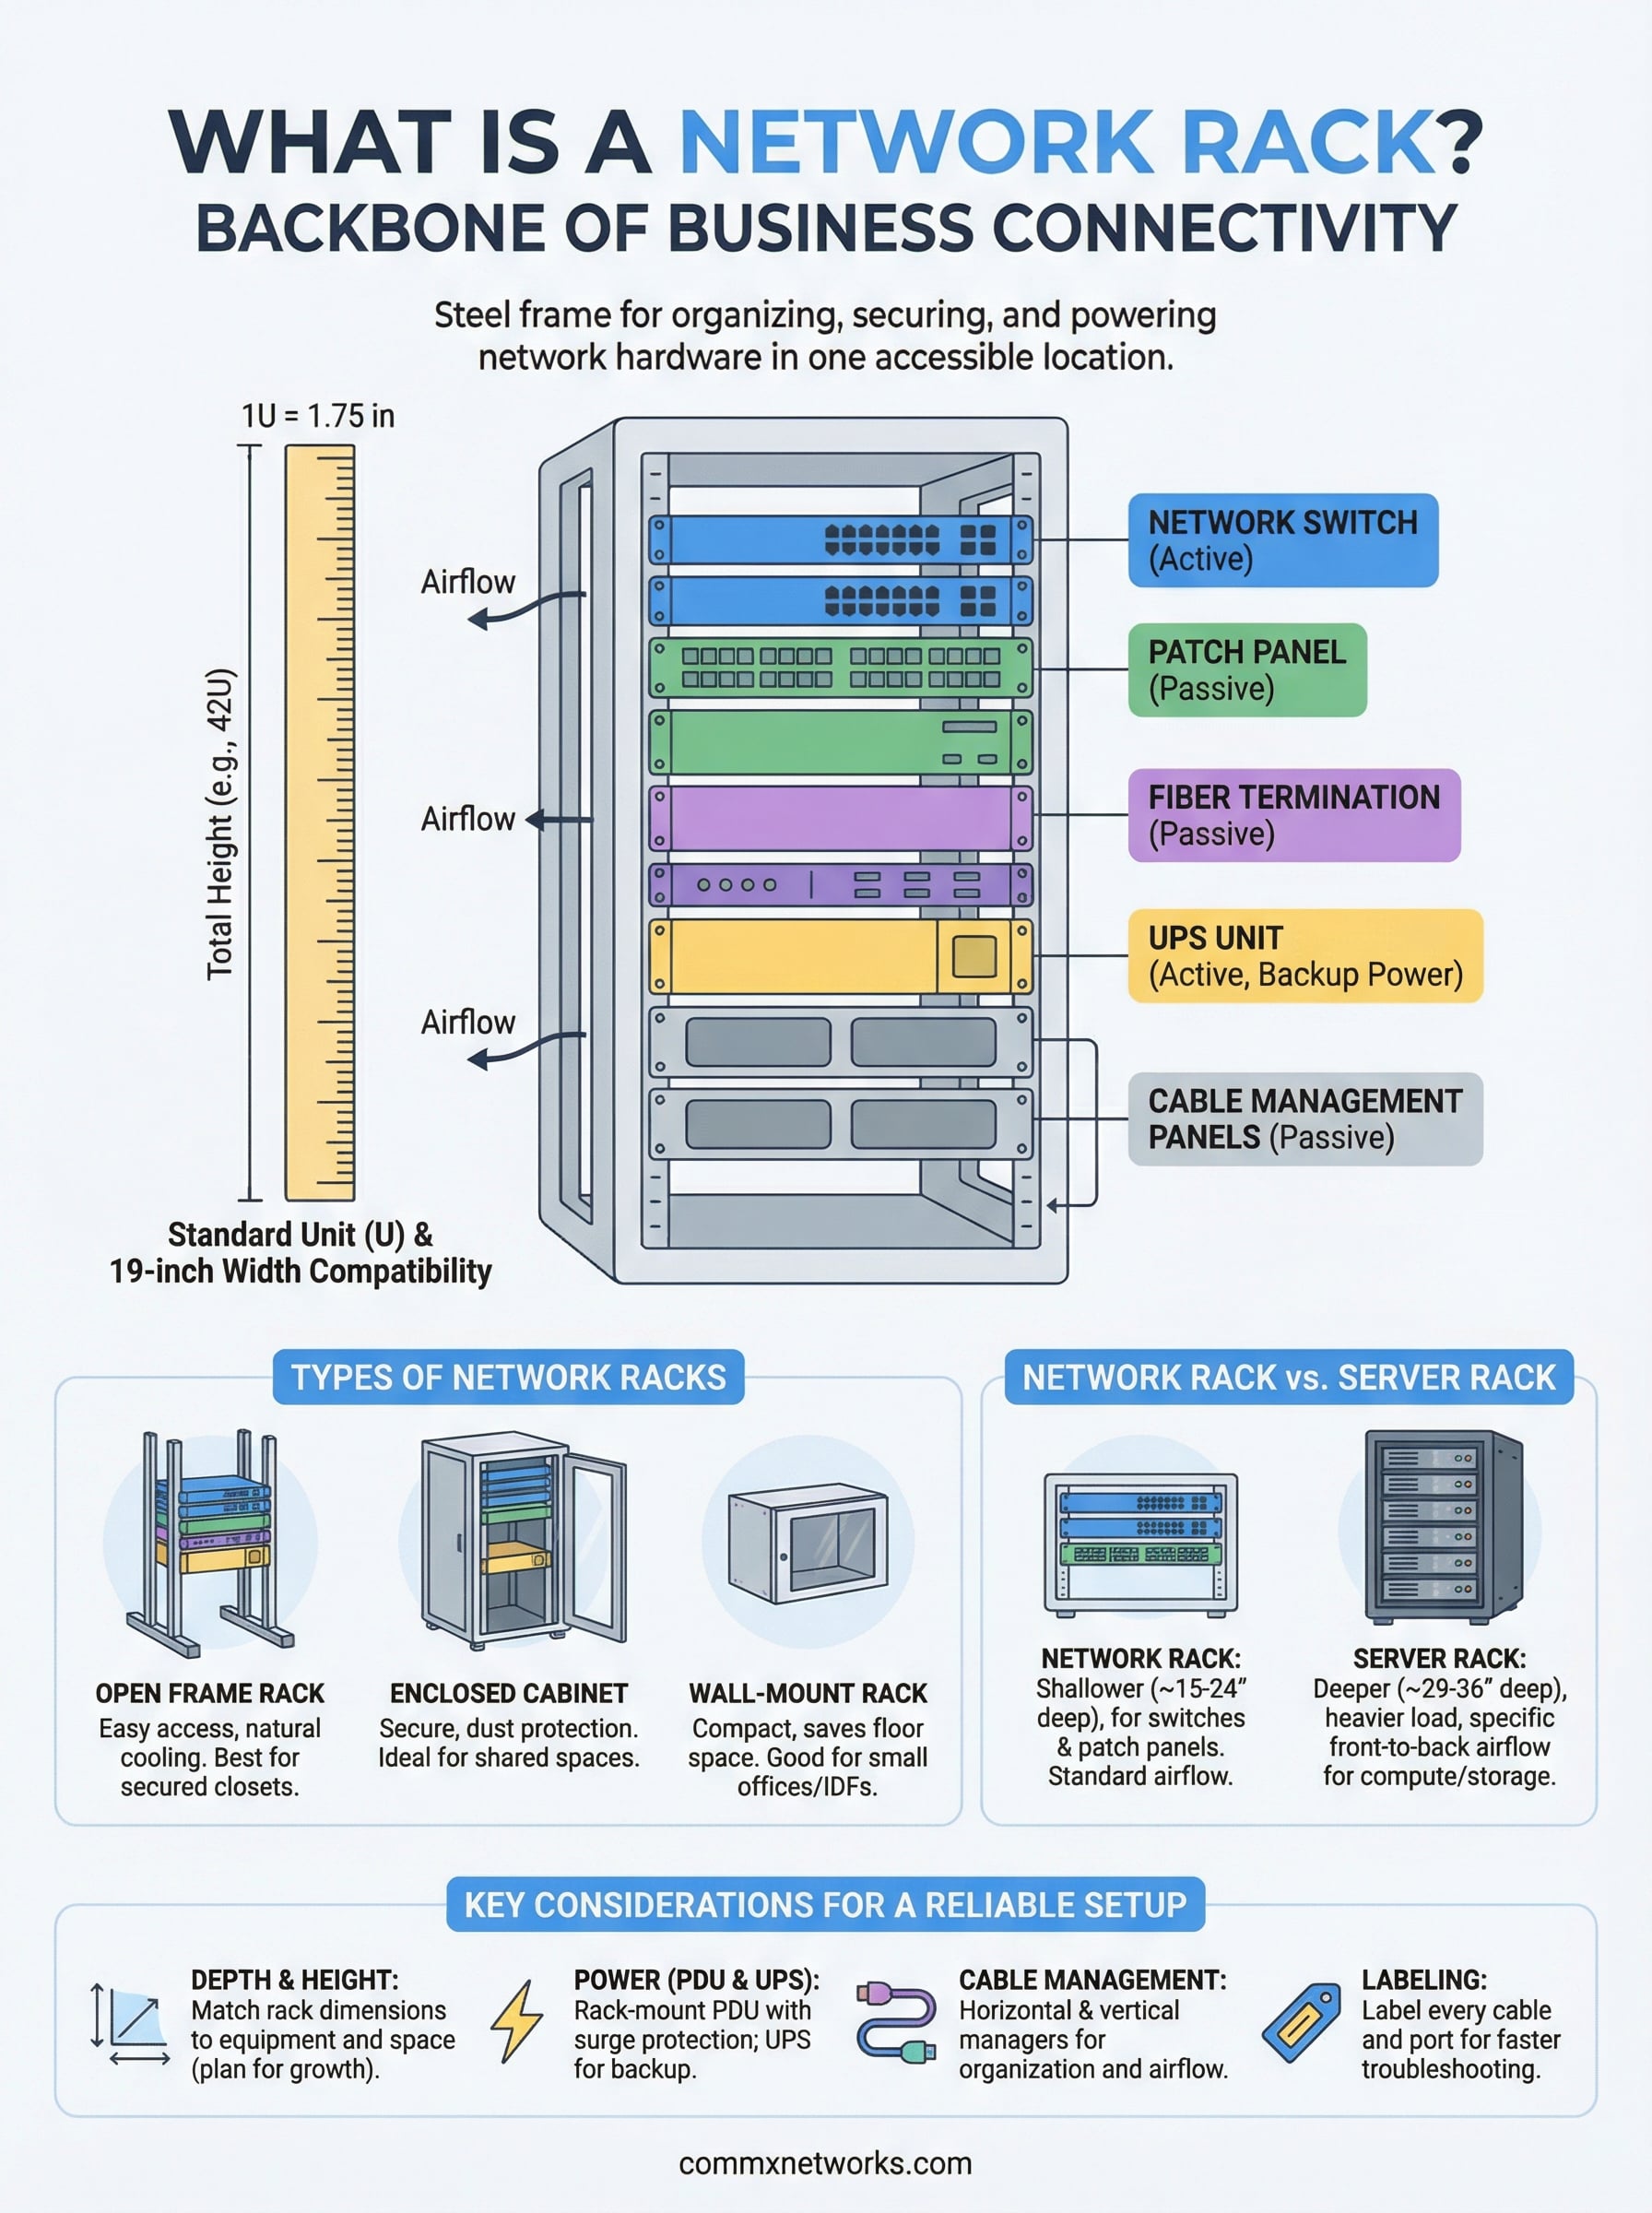
Now you know what is a network rack and why it matters well beyond simple organization. A rack is the physical foundation for your entire network, and the decisions you make around type, depth, height, and accessories determine whether your infrastructure stays manageable for years or creates recurring headaches as your business grows. Open frame racks work in secured closets. Enclosed cabinets belong in shared spaces. Depth and rack unit count need to reflect where your network will be in three years, not just today. Power protection, cable management, and proper labeling complete the installation and keep your team working efficiently long after the initial buildout is finished.
If you’re planning a new commercial facility, expanding an existing office, or replacing outdated network infrastructure in Southwest Florida, the right rack setup starts with the right partner. Contact CommX Networks to get experienced help designing and installing a network infrastructure built to perform.