
Running out of Ethernet ports on your router is one of the most common networking problems in both homes and offices. The fix is straightforward: how to connect a switch to a router is a simple process that takes about five minutes and instantly multiplies your available wired connections. Whether you’re adding workstations to a growing office or just need more ports in a server closet, a network switch is the most practical solution.
The process itself is plug-and-play in most cases, but there are a few details worth getting right, like choosing the right cable, understanding uplink ports, and avoiding common configuration mistakes that can slow down your entire network. This guide walks you through each step so you can expand your wired network with confidence.
At CommX Networks, we’ve spent 18 years designing and building commercial network infrastructure across Southwest Florida, from structured cabling systems to full LAN environments in warehouses and office complexes. We put this guide together based on hands-on experience wiring thousands of connections for businesses of all sizes. Let’s get into it.
What you need before you start
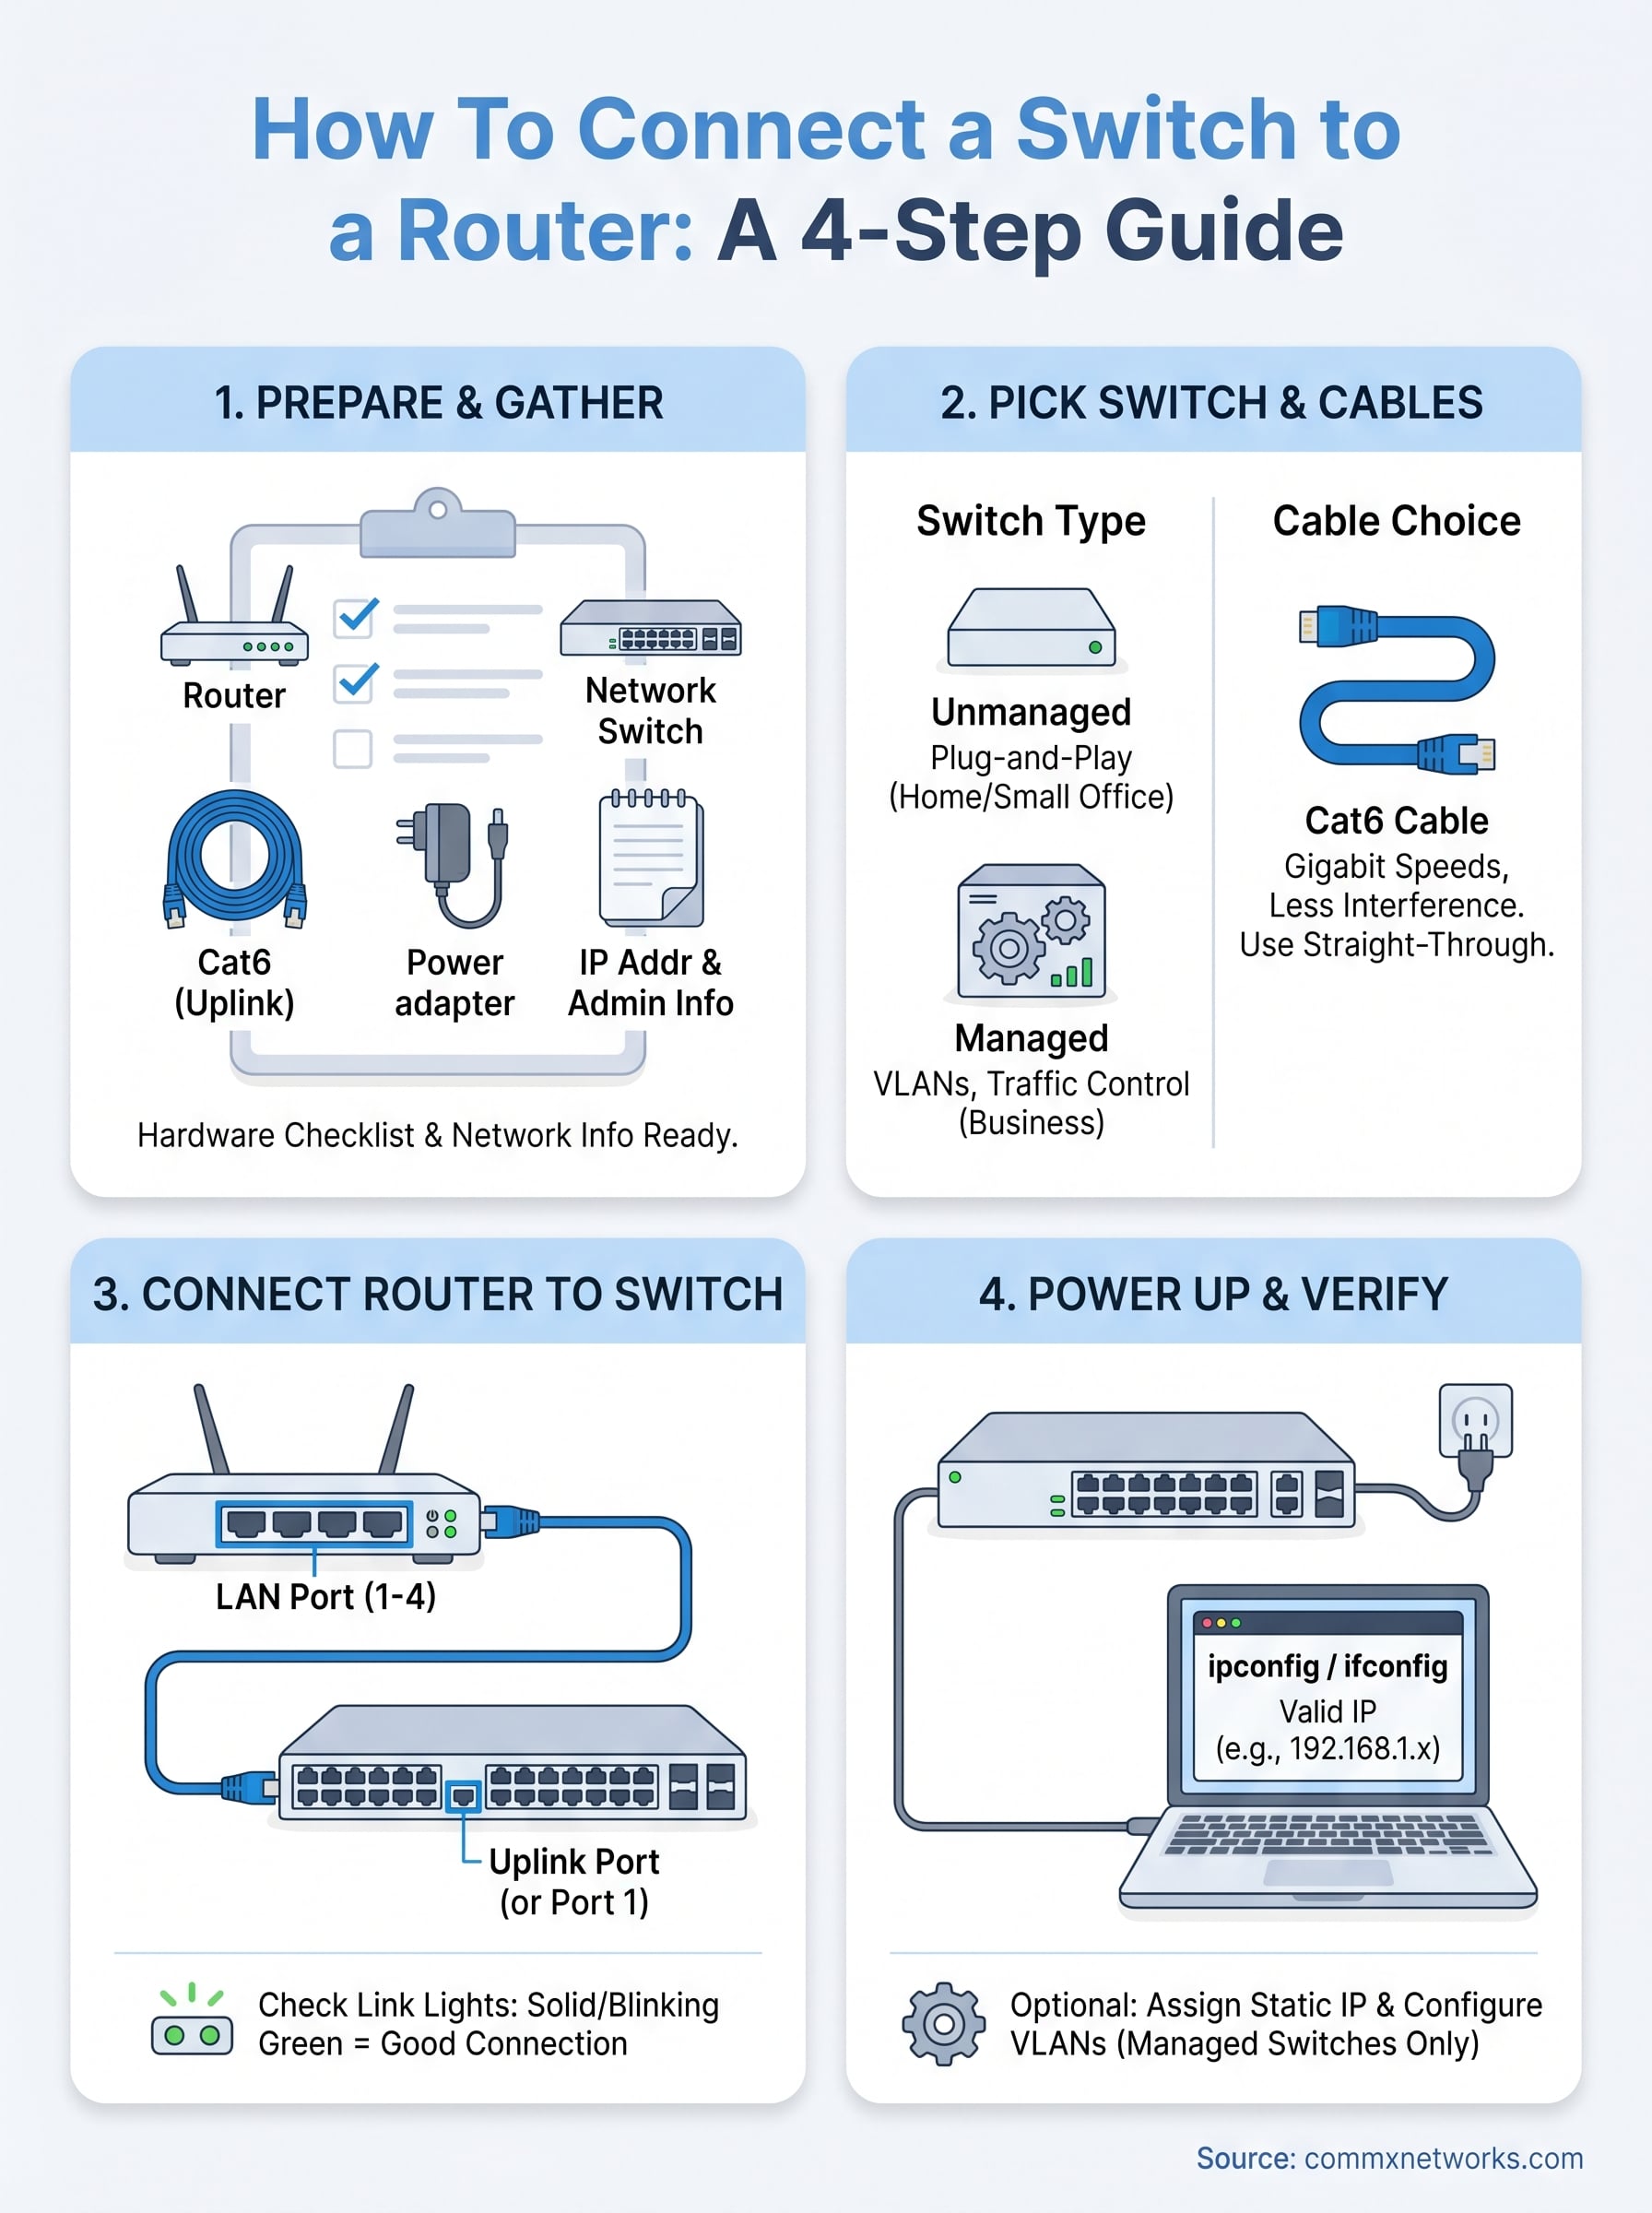
Before you start connecting anything, gather everything you need in one place. Having the right hardware and a basic understanding of your current setup will save you from stopping mid-task to track down a cable or look up your router’s IP address. Most setups only require three pieces of hardware, but skipping this checklist is the fastest way to run into a preventable problem.
Hardware checklist
You need four things to complete this setup: a network switch, an Ethernet cable to connect the switch to the router, a power source for the switch, and any additional Ethernet cables for devices you plan to connect. Here’s a quick reference:
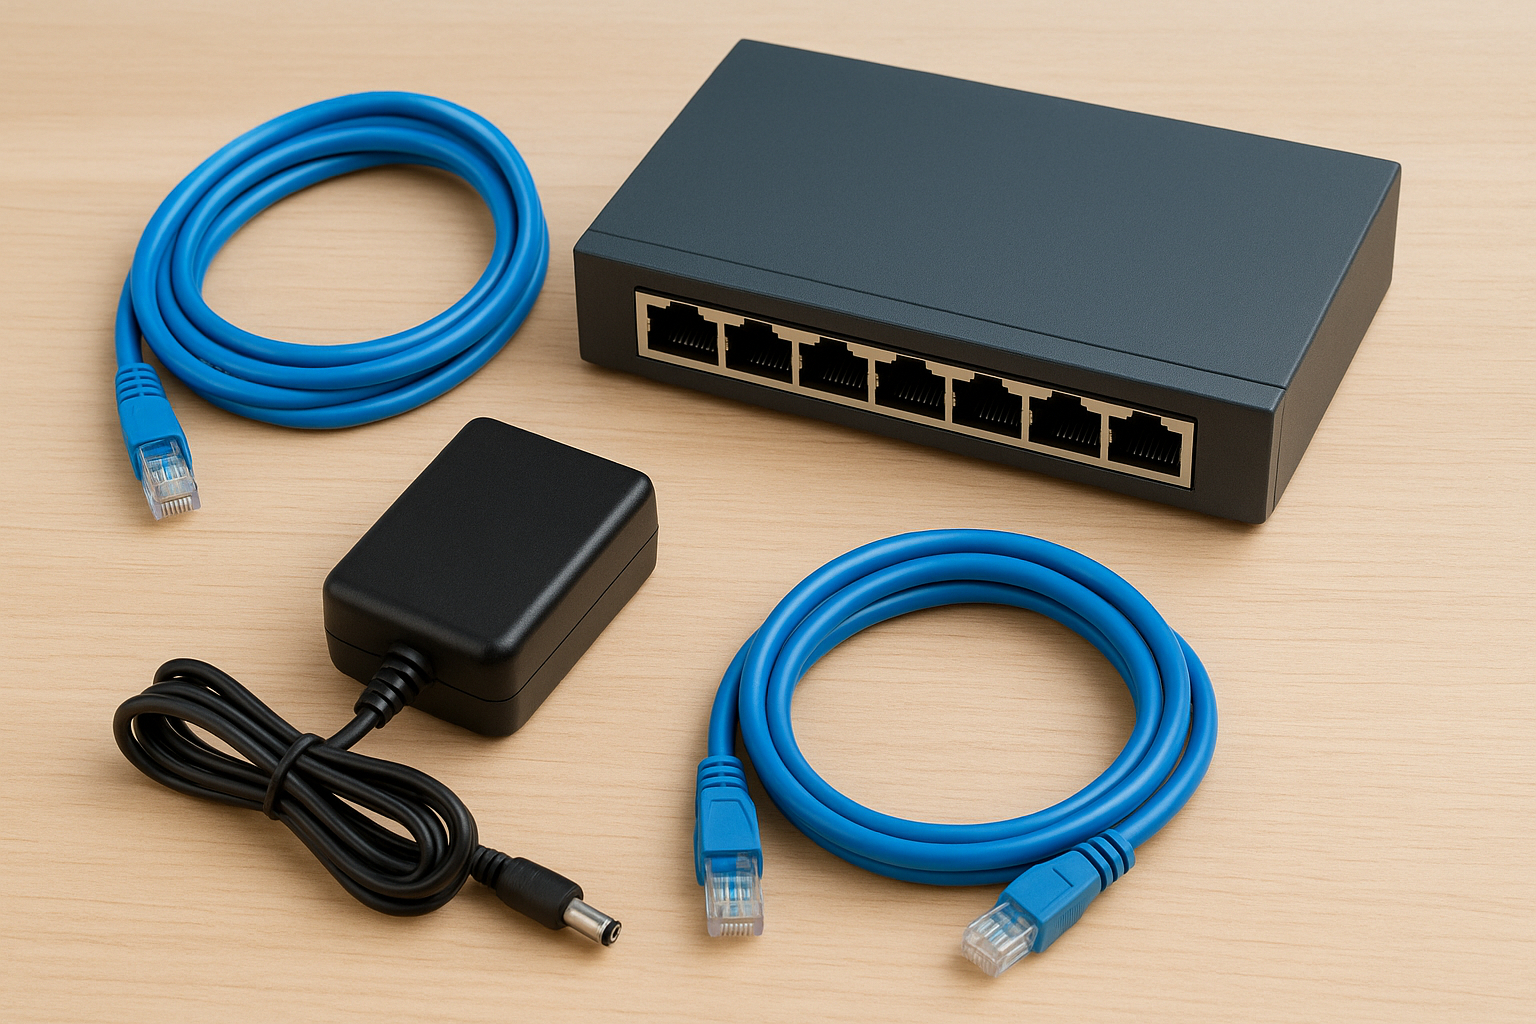
| Item | What to look for |
|---|---|
| Network switch | Unmanaged for simple setups; managed for office environments needing VLANs |
| Ethernet cable (uplink) | Cat5e minimum, Cat6 recommended for Gigabit speeds |
| Power adapter or PoE source | Matches your switch model’s power spec |
| Device cables | One Cat6 cable per device you’re adding |
For most office environments, a Cat6 cable is the right choice over Cat5e, as it supports full Gigabit speeds with less interference over longer cable runs.
Network info to have ready
You do not need to log into your router to complete a basic switch connection, but having access is helpful if something does not work right away. Know your router’s IP address (commonly 192.168.1.1 or 192.168.0.1) and have your admin credentials on hand. If you plan to configure a managed switch, you will also need your router’s subnet and DHCP range so you can assign a static IP to the switch without causing conflicts on the network. Check your router’s label or admin panel to pull this information before you start.
Step 1. Pick the right switch and cables
The hardware you choose here directly affects how well your network performs. Unmanaged switches work out of the box with no configuration required, while managed switches give you control over traffic, VLANs, and port priorities. For most small offices, an unmanaged Gigabit switch handles the job fine.
Managed vs. unmanaged switches
If you need to know how to connect a switch to a router for a basic office setup, an unmanaged switch is the right call. It requires zero configuration and starts working the moment you plug it in. Choose a managed switch only if your network needs traffic segmentation or VLANs for separate departments or security zones.
For commercial environments with more than 20 devices, a managed switch gives you significantly more control over bandwidth and security.
Cable selection
Cat6 cable is the right choice for the uplink between the switch and router. It supports full Gigabit speeds and handles interference better than Cat5e, especially over runs longer than 100 feet.
- Use a straight-through patch cable, not a crossover cable
- Cat6a is worth the upgrade for runs over 150 feet in commercial spaces
- Match cable length to your actual run to avoid excess slack tangling up a rack or closet
Modern switches auto-detect cable type, but starting with the correct cable removes any compatibility issues before they start.
Step 2. Connect the switch to the router
The physical connection takes less than two minutes. Plug one end of your Cat6 cable into any LAN port on your router and the other end into the uplink port on your switch. If your switch has no dedicated uplink port, use port 1 since most modern switches auto-negotiate on any port.
Identify the right ports
Using the wrong port is the most common mistake people make when figuring out how to connect a switch to a router. Your router’s LAN ports are typically numbered 1-4 on the back panel, and the WAN port is a different color or clearly labeled "Internet."
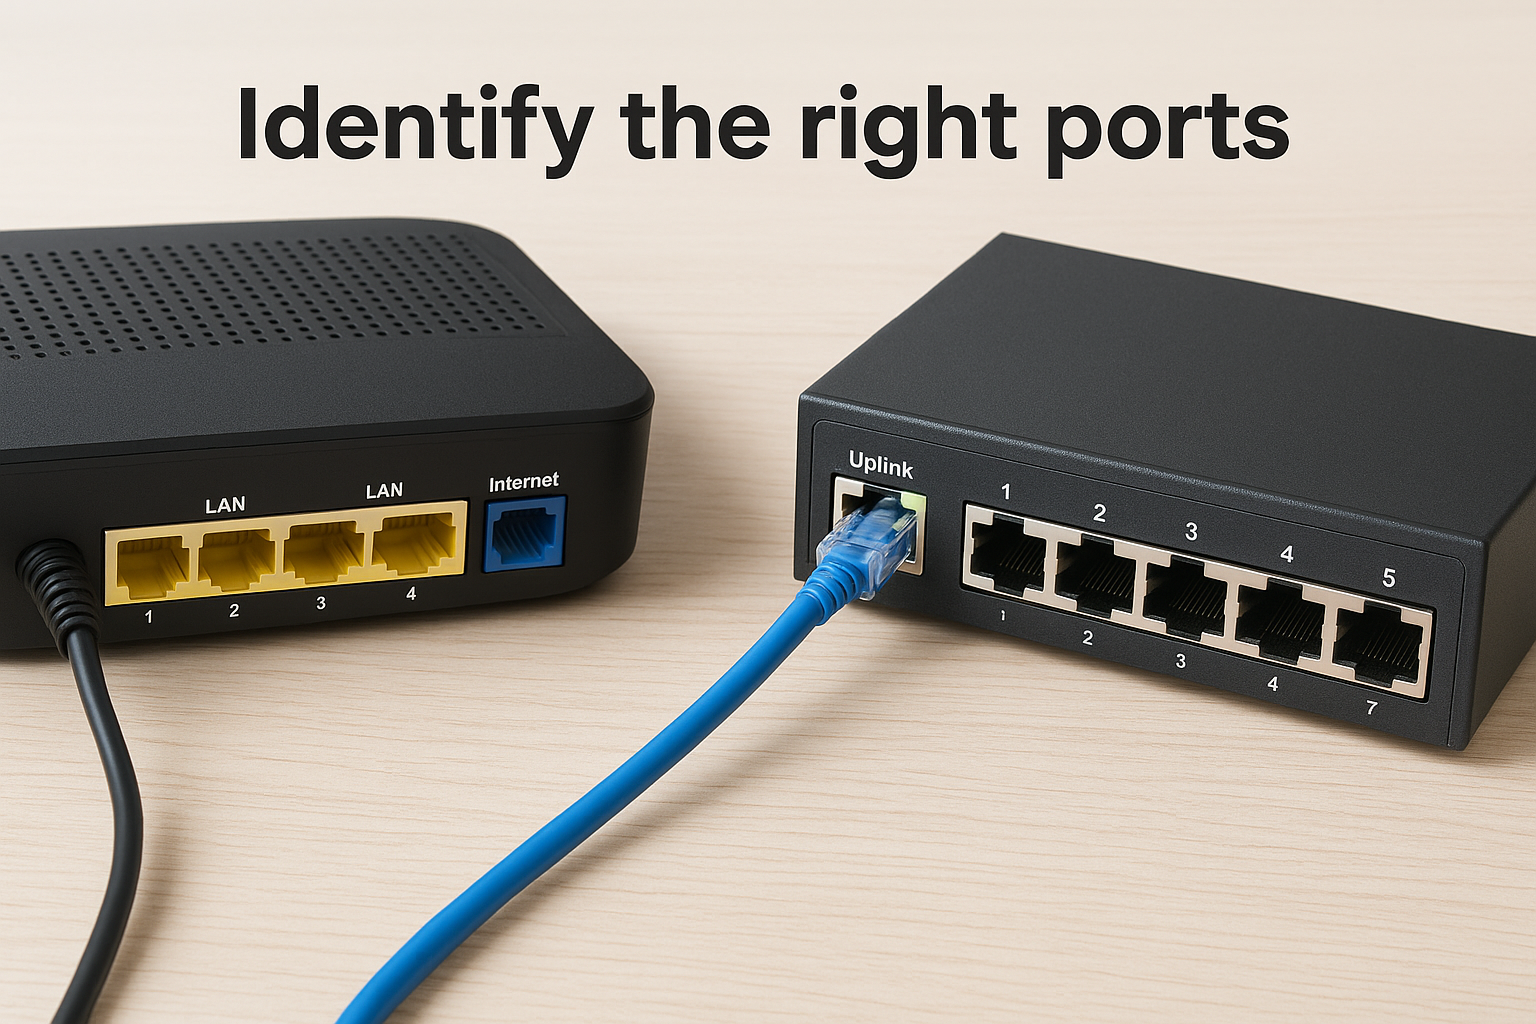
- Router side: any numbered LAN port (never the WAN port)
- Switch side: port labeled "Uplink" first; otherwise use port 1
- Cable type: straight-through Cat6, not a crossover cable
Plugging into the WAN port instead of a LAN port will break your internet connection immediately.
Check the indicator lights
Once connected, look at the link lights on both the switch and the router. A solid or blinking green light on both ends confirms a good physical connection. If the light stays off, reseat the cable firmly and try again.
- Solid green: active link, no current data transfer
- Blinking green: active link with live data traffic
- No light: loose cable, wrong port, or hardware fault
Step 3. Power up and verify everything works
Plug the switch into its power source and watch the indicator lights come on. A successful physical connection in how to connect a switch to a router shows up as a solid or blinking green link light on both the switch and router within a few seconds of powering on. If the lights do not come on, reseat the cable firmly on both ends before troubleshooting anything else.
Confirm devices get an IP address
Connect a laptop or workstation to any open port on the switch using a Cat6 patch cable. Your router’s DHCP server should automatically assign the device an IP address within seconds. Open a command prompt and run the following to verify connectivity:
ipconfig          (Windows)
ifconfig          (macOS/Linux)
You are looking for an IP address in your router’s subnet range, such as 192.168.1.x or 10.0.0.x. An address starting with 169.254.x.x means the device did not receive a DHCP lease, which points to a loose cable or a wrong port on either the router or switch.
Run a quick ping test to your router’s IP (e.g., ping 192.168.1.1) to confirm the device has an active network path before connecting additional devices.
Step 4. Optional settings for office networks
If you run a basic home or small office setup, your network is fully functional at this point. Office environments with more devices or stricter security needs can take a few extra steps to improve how the switch operates within your broader infrastructure. These settings apply specifically to managed switches and are not required for unmanaged models.
Assign a static IP to a managed switch
Most managed switches ship with a default management IP, often something like 192.168.1.253. You should assign a static IP within your router’s subnet to avoid DHCP conflicts and make future access predictable. Log into the switch’s web interface using the default IP, navigate to the IP settings, and enter values like the following:
IP Address:  192.168.1.200
Subnet Mask: 255.255.255.0
Gateway:     192.168.1.1
Once you set a static IP, document it so anyone who needs to know how to connect a switch to a router and access it later can do so without guessing.
Enable VLANs for traffic segmentation
VLANs let you isolate traffic between departments, keeping guest Wi-Fi, staff workstations, and security cameras on separate logical networks over the same physical cabling. In the switch’s VLAN settings, assign port groups to each VLAN ID that matches the configuration already set on your router. This keeps sensitive traffic contained without requiring additional hardware.
Wrap-up and when to call a pro
Knowing how to connect a switch to a router is a straightforward skill that pays off every time you need more wired ports. For most setups, you connect a Cat6 cable from a router LAN port to the switch, power it on, and your devices start pulling IP addresses automatically. If you added a managed switch, the optional steps above give you control over traffic, VLANs, and port assignments without much added complexity.
That said, some installations go beyond a simple port expansion. If you are running cabling through walls, setting up a structured cabling system, or deploying network infrastructure across a large commercial facility, a professional installation is the right move. Improper cable runs and poor rack organization create problems that grow harder to fix over time. The team at CommX Networks has handled commercial network buildouts across Southwest Florida for 18 years and can design an infrastructure that scales with your business.